Implemeting an Issue Tracker (Redmine)

For more than half a year now, I’ve been trying to get an issue tracker fully implemented for our IT team within the library. I admit that I’m still working on it. Getting the system up and running was easy enough, but trying to work it into people’s workflow isn’t so easy.

Choosing the Issue Tracker

There are a lot of issue trackers out there, but we are a small team and I wanted the issue tracker running easily and quickly. It’s not something I wanted to spend a lot of time getting up and running, because we had a lot of other projects happening.

Other requirements included:

  • support multiple projects
  • non-members being able to report issues
  • support email issue management (either built-in or plugin)
  • low to no cost

preferable

  • support CAS or LDAP login (either built-in or plugin)
  • documentation area and/or wiki
  • code repository integration
  • open source

I asked around a little bit, and these were the recommendations I got:

  • Asana: 2
  • FogBugz: 1 Against: 1
  • Footprints: – Against: 1
  • Github: 2
  • JIRA: – Against: 2
  • Pivotal Tracker: – Against: 1
  • Redmine: 5
  • Request Tracker: 1 Against: 1
  • SupportPress (for WordPress): 1
  • Trac: 3 Against: 1

Trac and Redmine seemed to be the two forerunners. My problem with Trac was that it didn’t have clear project organization, and no one could confirm that the email issue management plugin worked.

Installation & Setup

Our system administrator took a couple of (not full) days to get it installed and going, and following the instructions were apparently fairly easy. Then it took me maybe half a day to set up all the projects and users with the settings I wanted. The e-mail creation also worked well out of the box. We just had to make sure we had the right settings for what we wanted.

Staff Issue Creation & Management

In order to make it so that staff can file issues without ever having to see Redmine, I created a form in our Intranet (webform module in Drupal). The form had most of the standard fields:

  • Name: automatically filled in with username
  • E-mail: also automatically filled in
  • Related to: options which were essentially the project names
  • Need: options equivalent to tracker e.g. Support, Bug Fix, etc.
  • Priority: options equivalent to priority
  • Summary: email subject line, which then turns into issue name
  • Description: issue details

Once it’s submitted, a copy is sent to our team’s email. Through a cron job (every 5 minutes or so), the email is picked up, and filed.

If the user already exists in the system, Redmine will use the email from the user account to match it to the user, they will automatically become the ‘reporter’ of the issue, and get a copy.

If the user does not exist in the system, Redmine will say that ‘Anonymous’ reported it. This will always happen the first time someone reports an issue as I did not add everyone on staff to the system. So, the first time this happens, I then add the user to the system, and add them as a watcher to the issue.

The one issue I ran into was that I forgot you have to set both the email plugin and each project to accept issues from anonymous users. Simple carelessness really.

Getting Staff to Change their Workflow

I think the hardest part with implementing any issue tracker is getting staff to use it. Within the team, it hasn’t been too difficult. We have a small team and the developers in particular have no problems using it. The only problem I sometimes have is making sure they close issues when they’re done with them.

But even within the team, sometimes it can be difficult to get people to report issues using Redmine. While our manager wanted us to start using it just for the website, it has worked well enough, so we’re strategizing how to get the rest of the staff using it now.

We’ve concluded that it kind of needs to be an all or nothing. So we’ve decided that all non-urgent issues should be done through the intranet form regardless of the project, and that should people email us, we’re going to be emailing them back to submit it through the form.

For any urgent issues and for immediate support, they can still call us. After all, trying to walk someone through editing something on our website or intranet is much easier by phone anyway.

Before we start enforcing it, we’ll be introducing this workflow to staff through various committee meetings in part to gather feedback.

So… we’ll see how it goes.

Revised Articles Section & New Landing Page: Using a Card Sort to Clean Up

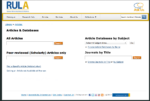
As part of the ongoing effort to improve the website, I have been redesigning the website one section at a time. Earlier in the term, I did the Research Help section. In the last couple of weeks (that’s right, only about 2-3 weeks!), I worked on getting the ‘Articles’ section cleaned up with a new landing page.

old articles page
Old Articles Landing Page

Card Sort to Clean Up

old articles menuI knew that I wouldn’t have time to do a proper card sort study, but I decided to do a card sort with the web committee. We have enough people that I divided the committee up into two groups and gave them sticky notes with the names of the existing pages.
The sticky notes consistent all the local navigation links from the left side of the existing page and the second level links you see in the expanded part of the ‘More’ menu here (right). Then, I gave the usual instructions for a silent open card sort (no talking, group as you see fit).

While the purpose of a card sort is not to help clean up a section, it really got staff to see what fit in the Articles section and what didn’t. A lot of the pages were also deemed no longer relevant.

As a group, we made decisions on what to remove, and what to move and where. Quite a lot of the content was moved to either our subject research guides or our FAQ system.

There were one or two pages that we couldn’t decide what to do with, so for the time being they’ve been left where they are for now (e.g. RefWorks page is still in the ‘Articles’ menu though not linked on the landing page).

Mockups

With the pages that were left, I created a few mockups.

The web committee met again to discuss the mockups. I already had my heart set on either #2 or #3, because the whole idea is that it’s simple and clear. Having only one search bar with just a few links give users focus on what they’re looking for. Different people had different preferences on mockups, but with some discussion, the group settled on mockup #3 with a few revisions.

Staff Feedback

As with the research help page, I posted the revised Articles mockup in the staff room to give everyone a chance to provide feedback. This time, I didn’t get any feedback that resulted in any changes, so the final page is the same as the revised version.

New Page

Even though I’m on vacation, I wanted to get the new page up before the next term, so the new ‘Articles’ landing page went up this week.

new articles page

Going Google at Ryerson University: Sync’ing Work Back to Usual

I have found some things on the Going Google site a little incomplete, so I thought I’d supplement it with a blog post.

Set up your Google Token

This is really easy. Just sign into the Apps tab, click on Activate Google Token, and hit Activate. One important note,

you will not be able to see your Google Token again after activating it the first time (and you close the window).

So, write it down in a secure place in case you ever want to sync your accounts with anything else.

Sync Apple Devices

So which method you choose depends on what you want to sync. Both will sync mail and calendar, but for:

  • Notes use Gmail option
  • Contacts use Exchange option (follow the instructions on the Going Google site)

I personally only read and reply to emails on mobile devices, so I chose the Gmail option so that I could sync Notes. Google provides instructions on using this method (it’s essentially the same process), and here are the details you need:

Name: your name
Address: full email address
Password: Google Token
Description: account display name on your device

Multiple Calendars

To sync multiple calendars, you can still do that using the Gmail option, but to change which calendars you want sync’ed:

  • sign into your Gmail account using a browser
  • then visit Google Sync for Apple to choose which calendars you want sync’ed

Getting Calendar in Thunderbird

UPDATE: If you’re having issues, it provides less integration into Thunderbird, but try ‘Google Calendar Tab’ which opens GCal like it would in a browser minus Settings/Labs.

I warn you now. Google Calendar in Thunderbird still has a number of issues. If you’re on a MAC, I suggest using Google Calendar in iCal instead. I prefer having everything in one client, so I’m willing to live with and report bugs when necessary, but who knows, I may change my mind.

Step 1: Install Lightning

The Lightning add-on page actually gives the newest stable version of the add-on (for Thunderbird 16), but the newest official release of Thunderbird is 15, so head over to the Versions list and find Lightning 1.7. Install it according to the instructions (using the Install Add-on from File option in the Add-ons settings).

Step 2: Install Provider for Google Calendar Add-on

This step is actually optional depending on what method you want to use. Google Calendar now supports using CalDAV in Thunderbird, but it’s marked as experimental.

Just search for Google Calendar in the Add-ons tab and install from there.

Step 3: Add your Calendar

If you chose to install the Provider for GCal add-on:

  1. Open your Google Calendar
  2. Click on the Settings link located in the box at the right of the page.
  3. Click on the calendar you want to use with Thunderbird Lightning or Sunbird.
  4. Copy the link from either of the two XML buttons shown at the bottom.
  5. In Thunderbird: File > New > Calendar > On the Network > Google Calendar
  6. For Location, paste the link, but change http:// to https://

For more information, visit the Provider wiki page.

If you chose not to install the add-on, follow the instructions from Google.

Testing Needed

So, I’m going to be using Thunderbird, and hopefully it’ll work out, but there are one or two things I wish it had already (like popup reminders for events others created). It is supposed to work better than through CalDAV. I’ve heard iCal has pretty good integration though so I might still switch to that if I’m unhappy with GCal in Thunderbird.

Getting Quick Feedback: Updating the Help Page

In the past month or so, it became very evident to many of the librarians that the research help page on our site needed to be revamped. As we’ll be piloting a new “Book a Librarian” service next month, I thought it would be a good time to roll out a new help page as well.

Old Research Help Page

There were so many problems with this page, not least of which was that the page and the sidebar had the exact same links only in a different order.

We had a bit of a tight timeline, since I essentially had 3-4 weeks to make mockups, discuss it with the group, get feedback from staff and students, make the page, and get it live.

Getting Quick Feedback

Part 1: The “Committee”

It wasn’t a formal committee, but it was essentially an ad hoc working group. I presented all three mockups to the group. If the group couldn’t agree on one, then I would have taken two of the mockups to staff and students for feedback. However, since the group felt quite strongly about mockup #3, I decided to go ahead with that mockup to gather feedback.

Part 2: Asking the Students – Survey

I decided to do two versions of the mockup based on the meeting’s discussions. Mockup #4 is exactly the same as mockup #3 except with the chat widget in the middle.

Mockup #4

We taped the mockups on a movable whiteboard and offered candy as incentive. We pulled students aside as they walked past on the main floor and asked them some basic questions on:

  • how easy it is to find what they’re looking for,
  • whether they understood all the terms, and
  • which design they preferred and why.

We had decided on getting however many students we could in an hour. Since it was a quieter day, we ended up with 7 students.

Part 3: Asking the Staff – Open “Silent Forum”

In order for all staff to have a chance to provide feedback, without having to gather them all together, we decided to post the mockups in the staff room with a couple of questions to think about (similar to the student ones). Sticky note pads and a pen were left for staff to write their comments.

The Results

Of the students we asked, more of them preferred #3 with the chat on the side, because they would never use it. On the other hand, the students who preferred #4 thought the right-side chat widget would be ignored or even mistaken as an ad. Other reasons for #4 included:

  • balanced and symmetrical
  • more aesthetically pleasing
  • better division of groupings
  • helps to promote the Ask chat service

Of the staff that provided feedback, they unanimously chose #4 for many of the same reasons that students provided.

Other feedback resulted in my adding:

  • a header for the chat widget,
  • “Hours & privacy policy” link for chat widget,
  • hover behaviour for chat widget,
  • tooltip text for “TRSM”, and
  • changing the wording of “YouTube” to avoid branding.

While we could’ve gotten more feedback, I think we got enough to help improve the page and implicit confirmation that it works.

New Research Help Page

Launch

The page, along with the new “Book a Librarian” service and a revised “Research Help Services” page is set to go live on Oct 1.

We will likely also be changing the “Ask Us” logo in the header to direct to this page as opposed to the “Contact Us” page as it does now. Hopefully, it’ll help to promote our services and resources, and get people to the right place.